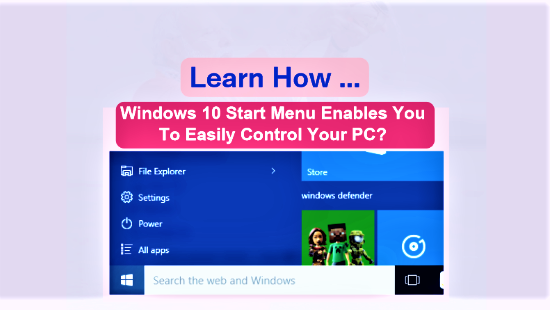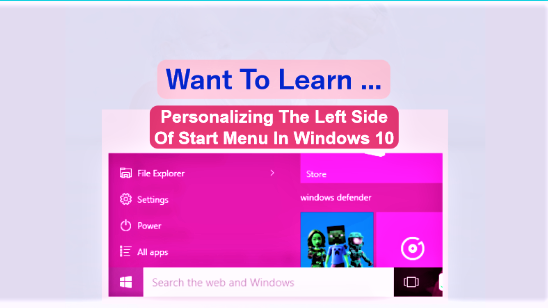
Personalizing Start in Windows 10 makes your device your own. This update lets you know how to customise the left side of the Start menu of your Windows 10 computer. After going through this post, you would have learned how to set an Account picture, the Most used and the Bottom left on the Start menu.
Widows 10 Start menu is the gateway to your Windows 10 world. You may want it to look the way you like it. So, how do you get that look? The answer is – customise the start men and get a personalised one that you like.
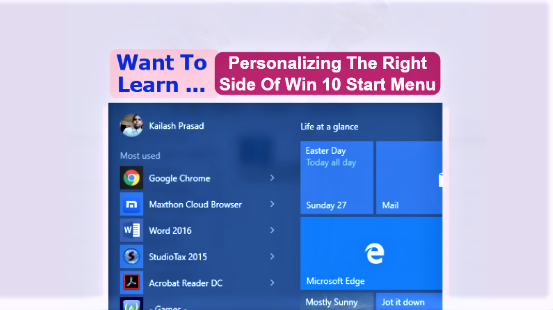
Now you may be thinking what you need to change to customise the menu? The answer is Personalizing Windows 10 Start menu involves manipulating and modifying its two faces – the left side and the right side – Windows 7 style Start menu and Tiles Start menu.
Page Contents ...
Personalizing Left Side of Start Menu
The first thing to personalize your Start menu is attaching an image of yours’. That is your identity on your Windows 10 machine. Your image on your device’s Start menu is your account picture on the machine.
Changing Account Picture
If you already have any picture with your account, you may want to replace it with your own picture to make the Start menu your own. Follow the steps below to have your account picture at the top left of the Start menu.

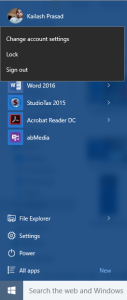
- Click or tap your account picture or account name. That will give you 3 options to choose from: Change account settings, Lock and Sign out. You can see that in Figure 1 above
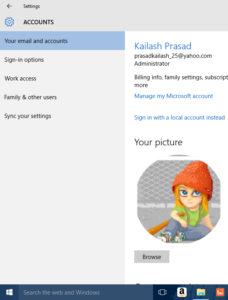
- From the options that you get, select Change account settings. Doing so will land you at an ACCOUNTS Settings screen as in Figure 2 (a)
- Click or tap Browse button in Figure 2(a) to select a picture you already have on your machine
- Then scroll down to select the picture you like. For selecting the picture click or tap Choose picture
- Subsequently, you will return to the Settings screen you see in Figure 2 (b)
- In this screen your previous account picture has been replaced by the one you chose
- That’s it. Close the window and click the Windows Start icon
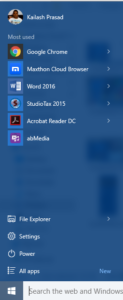
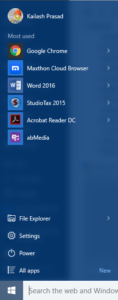
- Now your Start menu looks like the one shown in Figure 3
- You have your new account picture
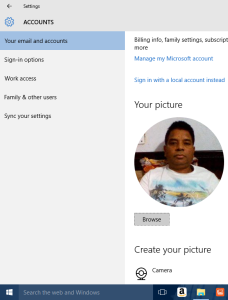
Alternatively, you can take a new picture with your computer’s webcam. To take a new picture, navigate down to Create your picture in the Settings screen in Figure 2 (a) and click or tap Camera. This launches your webcam. Click or tap webcam to take your picture. This picture will be your new account picture.
Using An Avatar For Your Account Picture
Also, you can use an avatar from internet for your account picture. Follow the steps below to get an avatar picture
- Launch your browser. I launched Google Chrome
- Search for avatars in your search engine. I searched my avatar on Google
- Go to the image viewing mode by clicking or tapping. I clicked the Images in the Google search result widow
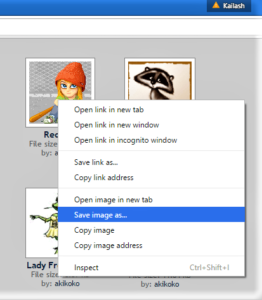
- I found an image as shown in Figure 4 below
- Right click or tap and hold the image
- Click or tap Save image as..
- The image is downloaded ** and saved on my computer
- Now click or tap Browse in picture 2 (a) and select the saved avatar picture
- Click or tap Choose picture
- The avatar picture you selected and chose for your account is your new account picture as shown in Figure 4(b)
** However, if the image doesn’t download on your computer
- Take a screenshot of the image by holding down the windows key and pressing print screen key on the keyboard.
- Windows will save a copy of the screenshot as PNG File in Pictures\Screenshots folder
Setting Up The Account Picture From The Screenshot Picture
To have this screenshot picture as your account picture, follow these steps
- Click or tap the File Explorer icon on the task bar
- Click or tap the Pictures folder in the File Explorer window
- Right click and click open or tap and hold the Screenshots folder
- This folder may have many screenshots if you took in the past and saved them. Select the one that you want to use for your account picture
- Double click it or tap it twice. A window with title Screenshot (23).png – Photos will open. This is the image editing window.
- Crop the image to get your account picture
- Save the picture
- Now click or tap Browse in Figure 2(a) and select the saved avatar picture
- Click or tap Choose picture
- This is your new account picture. See Figure picture 4(b)
- The account picture, as shown in Figure 5, is an avatar that replaced the account picture in Figure 1
Personalizing Start In Windows 10: Customizing Most used
Look at the Most used sections of the Start menus in Figure 3 and Figure 5. Each contains a list of applications I have been using in the past. To be able to know what you can customize in the Most used, right click or tap and hold any of the applications in this section.
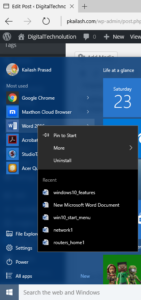
I right clicked Word 2016, Google Chrome and Acer Quick Access and took the screenshots. The cropped screenshots are shown in Figure 6(a), 6(b) and 6(c) respectively.
I took these screenshots on my Windows 10 powered Acer laptop.
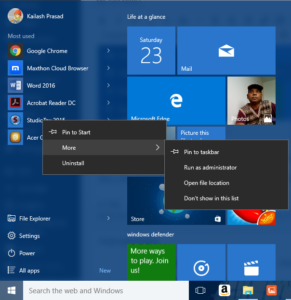
Look at the 3 pop up windows that appear on right clicking. Three entries on the top are common to all the 3 pop up windows. These are
- Pin to Start
- More
- Uninstall
You have control over these 3 items in customizing or personalizing your Start menu. You don’t have anything to customize in Recent (the recently used) and Most visited etc.
Let me talk about how to customize Start menu by manipulating these 3 items.
Pin The Menu Items To Start
The Windows 10 lets you pin the most used items to Start. So, how do you do that? The answer to this question is – you do that by right clicking or tapping and holding the app that you want to pin to Start screen Tiles. Subsequent to that you click or tap Pin to Start. Now, the app will be pinned to the Tiles menu. In this update, I have used the terms Start menu Tiles, Start screen Tiles and Start menu interchangeably to mean the same thing.
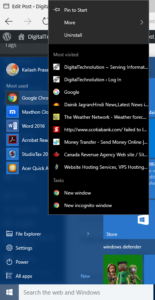
Other than pinning an item to the Start screen, you can perform more actions on the items. The More option gives you the following options on hovering cursor over it or tapping it.
- Pin to task bar (or unpin from task bar if the app is already pinned to the task bar)
- Run as administrator
- Open file location
- Don’t show in this list
To pin an app to task bar, right click it or tap and hold it, then hover over or tap More and click or tap Pin to task bar. Doing so pins the app to the taskbar. Refer to Figure 6(c) to understand Pin to taskbar action. Please note that this action will not remove the app from the left side of Start menu. The app will show at both locations.
Personalizing Start In Windows 10: Customisation Of The Most Used
The other customization you can do in the Most used list is that you can remove an app from the menu by right clicking or tapping and holding it, then hovering over or tapping More and clicking Don’t show in this list. Please refer to Figure 6(c) to understand Don’t show in this list action. The app will not show in the list.

Finally, if you want to remove an app from your computer, right click or tap and hold it in the Most used list and click or tap Uninstall. Please refer to Figure 6(a) to understand the Uninstall action. The app will be removed completely from your computer.
Personalizing Start In Windows 10 By Customizing Bottom Left
You can customize Bottom Left of the Start menu below the Most used to set Start menu colour. Also you can select the items that you want to appear in the Start menu. Remember that customizing this section controls the colour of the entire Start menu including right side Start Tiles. Also, you can set more tiles to appear on Tiles menu by turning “Show more tiles” on.
Let me explain the options available in Choose a colour in Figure 7(a). Please go through the following.
- Automatically pick an accent colour from my background, when turn on, picks a colour for Start menu automatically when you change the desktop background
- Show colour on Start, task bar, action centre and title bar, when turned on, allows a change of their colours the background changes. If it is turned off, the background change doesn’t cause any change in their colour
- Make Start, task bar and Action Centre transparent, when turned on, are transparent
An Explanation Of Personalization Options
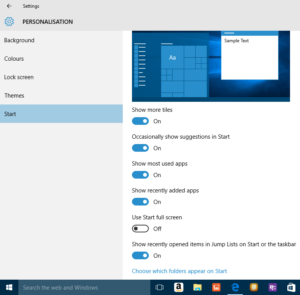
An explanation of options available in personalization settings in Figure 7(b) is as follows
- Show more tiles, when turned on, shows a larger number of tiles on the tiles menu. If it is turned off, the smaller number of tiles are available on the right
- Occasionally show suggestions in Start, when turned on, shows suggested apps in the Start menu. These are ads and you can turn them off if you want so
- Show most used apps, when turned on, shows most used apps in the Most used section of the Start menu. If you want no item to show up, turn it off
- Show recently added apps, when turned on, shows the apps that you installed recently. Turn it off, if you don’t want it to show up
- Use Start full screen, when turned on, enables your computer to be in full screen start mode. If you don’t like that, turn it off
- You can turn on or off “Show recently opened items in Jump Lists in Start or taskbar
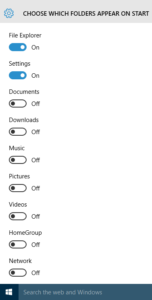
Click Choose which folders appear on Start at the bottom in Figure 7(b). You will get the options as shown in Figure 7(c). In this Figure File Explorer and Settings are on. So they appear in the bottom left of Start menu below Most used items list. You can turn on the folders that you want to appear in your Start menu.
The options available to you to turn on are: Documents, Downloads, Music, Pictures, Videos, Home Group, Network and there could be many more.
Personalizing Start In Windows 10 By Customizing All Apps
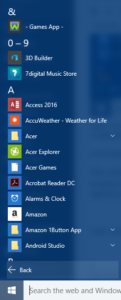
All apps, when clicked or tapped, displays a list of programs installed on your computer, in alphabetical order, as shown in Figure 8(a).
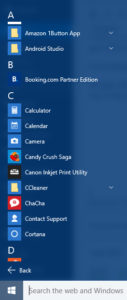
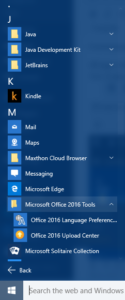
It also displays some programs in logical groups. For example, as shown in Figure 8(b), Microsoft Office 2016 Tools appears in M section of the alphabetical listing of programs. And a logical group of programs – Office 2016 Language Preferences and Office 2016 Upload Centre appear under Microsoft Office 2016 Tools heading.
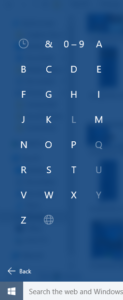
This order of program listing – alphabetical and logical group – can’t be changed in any way. However, if you want to get to a program starting with a particular alphabet, you don’t have to scroll down to it all the way. Just click or tap any alphabetic header (a – z) or & and 0 – 9 and you will get a window like the one you see in Figure 8(c) below.
In this window click the alphabet that is the first letter of the program you want to get to. Let us assume, you want to launch Windows Media Player which is far below in alphabetical order. The first thing you need to do is click any alphabetic header to get to the window in Figure 8(d).
Now, press W and a list of all the programs starting with W will appear in the Start menu. Then look for Windows Media Player in the list. After you have found it, just click or tap it. Now, you have launched the media player for you.
Conclusion
This update has endeavoured to explain in detail how to personalize and use the left side of Windows 10 Start menu. However, the task of personalizing the Start menu as a whole would be complete when explain personalizing right, in the following update.