Page Contents ...
Cortana: An Introduction
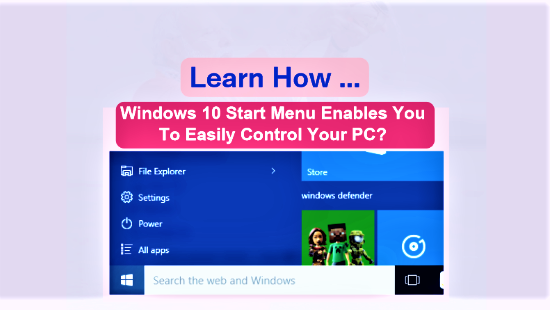
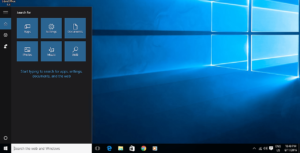
Launched initially on Windows Phone, Cortana is Microsoft’s digital personal assistant for the users of Windows 10 powered devices including PCs and phones. Cortana is one of the most important of Windows 10 features. When you launch your Windows 10 PC and you have not yet set her up, your desktop looks like the one shown in Figure 1 below. To use your AI (artificial intelligence) based digital personal assistant on your PC or device, you need to enable her first.

To explain how to set up your digital personal assistant on your PC, I used my Windows 10 desktop PC. I turned it on. The desktop looks like the one shown in Figure 1 above.
To set up Cortana on your device, you need to click or tap Search the web and Windows search box to the right of Start icon. I clicked the box on my Windows 10 desktop PC. A window pane as shown in Figure 2 below popped up.
Cortana: Configuring The Basic Settings
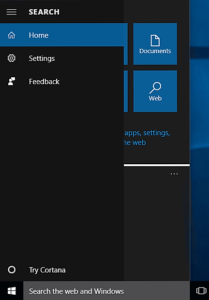
If you click or tap the hamburger icon on the top right corner of the pane, the names of all icons display to their right. As such, I did so and the names of icons appeared in the following order from top to bottom. I am listing the icons’ names in pink below.
- SEARCH: Hamburger represented by three horizontal lines
- Home: A house
- Settings: A gear symbol
- Feedback: A human face looking at a sheet of paper
- Try Cortana: A circle
Click or tap the circle, Try Cortana, above the Start icon in Figure 3. I clicked the circle and a window pane shown in Figure 4 below appeared.
Cortana: Geographical Settings
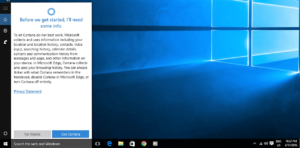
The geographical settings are the most basic settings you need to configure on your PC to be able to activate and use your AI based personal assistant. These are your country or region specific settings.
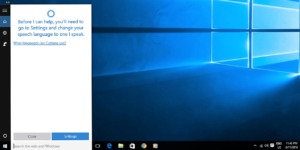
To set up Cortana click or tap Use Cortana. I clicked Use Cortana as shown Figure 4. Doing so, displayed a window pane as shown in Figure 5. Look at the message in the Home section in the SEARCH menu. It says, “Before I can help, you’ll need to go to Settings and change your speech language to one I speak.”
To use Cortana, your region and language settings need to be configured. That means if you live in Canada and your Country or region is set to Canada, your Speech language should be set to English (Canada). Any mismatch in the settings would not let Cortana work on your device.
After Cortana is set up on your device and if you change your region, you might not shop at the Store. Also, you might not use your memberships and subscriptions, TVs and movies, games and music.
Click or tap What languages can Cortana use? in the window pane in Figure 5 below. Doing so displays a list of languages that she can use in various countries or regions of the world.
Now click or tap Settings and you will get TIME & LANGUAGE settings window pane as shown in in Figure 6 below. Clicking or tapping Settings, also, replaces Search the web and Windows on the right side of Start menu icon by I’m Cortana. Ask me anything with a circle to the left.
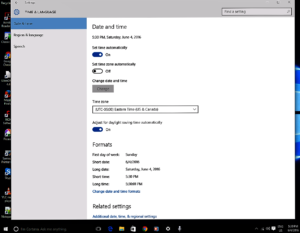
Date & Time
Look at Figure 7 below. The first entry in the TIME & LANGUAGE Settings is the Date & time. Click or tap Date & time to set the current date and the time zone of the place you are located in. This sends you to a Time and date pane as shown in Figure 6. Set the date and time by turning on or off the slider. You can set the time and date formats as well.
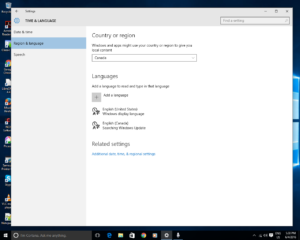
Region & Language
Look at Figure 8 below. The second entry in the TIME & LANGUAGE Setting is the Region & language. Clicking or tapping this setting opens a Country or region pane. Select your country or region from the drop down list. Below Country or region in the pane is Languages section. Click or tap the + sign to add a language you want to use to read and type.
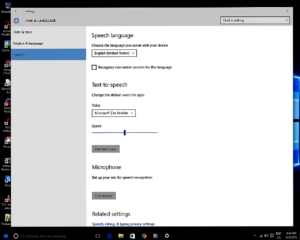
Speech
Look at, Speech, the third entry in the TIME & LANGUAGE Setting in Figure 6. On clicking or tapping Speech, a window pane pops up on the right. Select your language that you speak with your device. Configure Text-to-speech. And last but not the least set up your Microphone for speech recognition.
The above are the basic settings you have to configure to be able to use Cortana. However, I can’t yet use Cortana despite all the settings I made so far. This is because of the fact that she is not yet fully set up for use on my PC in Canada, the country of my residence. Look at the Speech language setting in Figure 6. It is set to English (United States). Also, look at the Country or region setting in Figure 7. It is Canada. This mismatch between the Region or country (Canada in this case) and the language of that Region or country (English – US in this case) is the reason why Cortana is not yet active on my PC. Now, I am going back to Figure 6 to change English (United States) to English (Canada) as my speech language, the language of Canada.
Cortana Is Ready To Listen
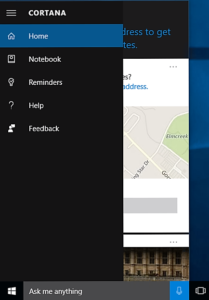
Your personal assistant is now active on your PC. Click or tap the hamburger icon in Figure 9. It’s name has changed from SEARCH to CORTANA with 3 new items added to the menu list. These new menu items find their place between Home icon on the top and Feedback icon at the bottom.
The first added menu item, immediately below the Home icon, is the Notebook. The second and third new menu items find their place below Notebook. These are Reminders and Help respectively. You can notice a very significant change in the menu bar. The gear like Settings icon disappeared. In fact, this icon now finds place in the Notebook menu which you can see by clicking or tapping Notebook.
After Cortana is enabled on your device, click or tap Ask me anything in the search box in Figure 9. In fact, the search box text has now changed from “I’m Cortana. Ask me anything.” to “Ask me anything“. She knows that you know her and she doesn’t need to introduce herself to you.
Clicking or tapping the Ask me anything search box returns you to Home menu item. Since you have not yet set up your mic, she will ask you to do so. Look at Figure 10 below.
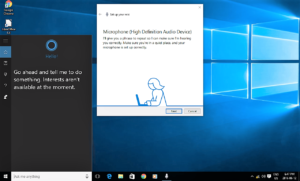
Setting Up Your Microphone
To talk to Cortana in your microphone, you will have to setup your microphone so that she can hear you correctly. As shown in Figure 10 above, she says, “I’ll give you a phrase to repeat so I can make sure I’m hearing you correctly. Make sure you’re in a quiet place, and your microphone is setup correctly.”
You may be using skype or any other service already. If you do, you may be speaking into microphone to talk to someone on the internet. As such, your microphone is already setup. You don’t have to do anything for setting up your microphone. Click or tap Next, as shown in Figure 10, and Cortana will give you a phrase to read it for her so that she learns the sound of your voice.
To talk to Cortana, click or tap the Microphone icon on the right side of the search box. Start talking in the microphone subsequently.
In her role as your personal assistant she will help find things on your PC, manage your calendar, track packages, find files, chat with you and tell jokes. The more you use her, the more personalized your experience will be.
Now Cortana is active on your device. However, to let her discharge her duties as a personal assistant to you the way you want, you need to customize her menu settings in Figure 9.