Are you someone who has never used WordPress? Do you want to learn WordPress so that you can create your blog or website? Also, do you want to have an answer to the question – Can a learner create a WordPress site while learning?
If you answer ‘yes’ to any or all of the above questions, you are at the right place to get those questions answered. Just keep going down the page. And after you finish reading this post, you will be convinced that the WordPress is a user friendly software. So, it’s very easy to learn it. And ultimately, you will have a complete knowledge about how a learner can create a WordPress site.
Since, WordPress is a user friendly, easy to learn, feature rich, flexible and free to use software, it’s popularity is steadily on the rise. As on today, it is the most popular website building software in the world.
After reading this post, you will understand how WordPress works to help you build your website. And finally, you will be able to create your website without any knowledge of programming and coding.
You don’t have to spend a lot of time on learning this software. Neither, you have to spend any money to learn it. In fact, you can learn it at your own pace without paying any money for this software.
However, it is imperative that you follow every step from the beginning to the end of this post.
Page Contents …
Can A Learner Create A WordPress Site?
Yes, a newbie, learner or beginner can build a website using WordPress even while learning. However, a question may creep into your mind. And that is – are there any pre-requites for some one to be able to learn WordPress?
The answer to the above question is – some one who wants to learn WordPress and create a website must fulfil the following pre-requisites. These are the essential computer and internet skills one should have to learn WordPress and create a website.
- Word processing skills – that means creating and editing document on a computer and saving it. I am skilled in using Microsoft Word
- Use of internet
- Performing a search using Google search engine and other search engines
- Installing and uninstalling software on your computer
If you have the above skills, you can learn and create a WordPress website even if you never created a website before.
You as a beginner will not have to edit or change any code in the WordPress core software while creating your first website.
However, the first question you, may have in your mind is whether you should build a WordPress.org website or WordPress.com website? Also, you could have another related question. And that is, what is the difference between WordPress.org and WordPress.com?
The following paras will answer your above questions. After you have understood the difference between the WordPress.org and WordPress.com, you should be able to decide whether to build a WordPress.org or a WordPress.com website.
What Is The Difference Between WordPress.org And WordPress.com?
The main difference between the two is as follows:
- WordPress.org is a website you download WordPress software from. However, after you download this software you will need to install it on a third party’s web server and then create your website on this software. Thus, when you host your website on a third party’s web server, the hosting is called self hosting
- And the WordPres.com is a hosting service. To use this service, you will not have to download the WordPress software and pay for hosting. This is called a managed hosting
After knowing the most basic difference between the WordPress.org and WordPress.com, we can dive a bit deeper into both of them.
WordPress.org
When you use WordPress.org, you build a self-hosted website. With this software you can create a very simple blog and also a very complex websites and also anything in between. Worpress.org can help you create a website in any niche.
Your website is called a self hosted one, because you yourself host this website on a web server that you pay for. A hosting service provider maintains and runs this server.
Thus, while you use WordPress.org for free, you pay a fee for hosting your website. And also, you pay a fee for the domain name of your website. This domain name is the address of your website on the internet.
There are many companies that provide hosting services for WordPress websites. Among them the Bluehost, GoDaddy, SiteGround and HostGator are popular ones to name a few.
The web host for this website – pkailash.com – is HostGator. This website’s address on the internet is pkailash.com. In other words, the the domain name of this website is pkailash.com.
When someone wants to visit this website, he or she types the domain name in the address bar of his or her device’s browser.
To build and publish your WordPress website, you have to do the same thing that I did. And, I did the following three things:
- Subscribed to the hosting service of HostGator for a shared hosting. I pay a hosting fee to them as per the plan I chose
- I selected a domain name for my website which is pkailash.com. It was a free domain for a year. However, from the second year onwards, I pay a domain renewal fee every year
- Performed a QuickInstall of WordPress software on HostGator’s server. I didn’t pay any price for WordPress core software
It’s now clear that WordPress.org is a software available for free to anyone who wants to builds a website. The only money he or she will have to spend is the fee for the domain name and the hosting service.
WordPress.com
WordPress.com is a website hosting service. Automattic is the name of the company that owns it. This company maintains and run the WordPress hosting service. If you host your website on WordPress.com server, you will not have to pay any fee for this service.
However, you will not have any control on your free WorPress.com website. From the domain name of your website to it’s customisation to adding and deleting any functionality, all are out of your control.
Although, you can have some or more control on the WordPress.com website if you go in for a paid plan. The more you pay, the more choices you have to customise and add functionality to your website.
The more you pay, the more control you have on your WordPress.com website. However, you don’t have the full control on your website as you do on your WordPress.org website.
Thus, the WordPress.com website has obvious limitations as it provides the website owner with no control or limited control over the website.
Why Should A Learner Create A WordPress.org Site?
As a learner of WordPress, you will want to be able to build a WordPress website yourself. Since, you don’t have the freedom customise, add and delete functionality to a WordPress.com website, you don’t gain significant knowledge and experience of the WordPress ecosystem.
However, if you create a WordPress.org website, there is a chance you will learn a lot about this software. The reason for that is – it requires you to have some technical skills. Obviously, if you don’t have those skills, you have to learn them.
You need to download the software and install it on a web server. Subsequently, as per your requirement you need to research, find and install the themes and plugins to your website.
Also, you may have to uninstall the themes and plugins and install the new ones in their place.
A WordPress.org website places more responsibility on you than a WordPress.com website does.
While creating your WordPress.org website, you learn its entire ecosystem. And also, you create your WordPress.org website while learning.
Thus, the WordPress.org website has several advantages when you create your website in any niche.
Both WordPress.org and the WordPress.com have the pros and cons associated with them. However, I will not be making a detailed comparison of them in this post.
Since, the self hosted website provides the users full control on their website, most people prefer using WordPress.org. Also, if you want to get a deeper insight into the WordPress platform, your obvious choice would be WordPress.org. If you have a WordPress.org website, you have the freedom to customise it. Also, you can add/ delete any functions to/ from your website.
Steps To Create A WordPress Site
The following paragraphs will provide you the information about how you should proceed towards building your WordPress.org website. From now on, where ever I have used WordPress, I mean WordPress.org.
Initial Set Up
You can build any type of website using WordPress. This software is free to download and use. Since, this software is very flexible and easy to use, you can create a website in any niche. Designs and addons that you can use with this software let you create a any niche website of your choice.
Since, I use the HostGator’s web hosting service for running my two websites, I will show you how to sign up with this service provider. If you want to sign up with any other hosting service provider, you can do so. The procedure for signing up is the same.
After you complete signing up, you can proceed to install WordPress on your domain.
Create An Account With The Web Hosting Provider
In the following paragraphs, I will show you how to sign up with HostGator and create your account.
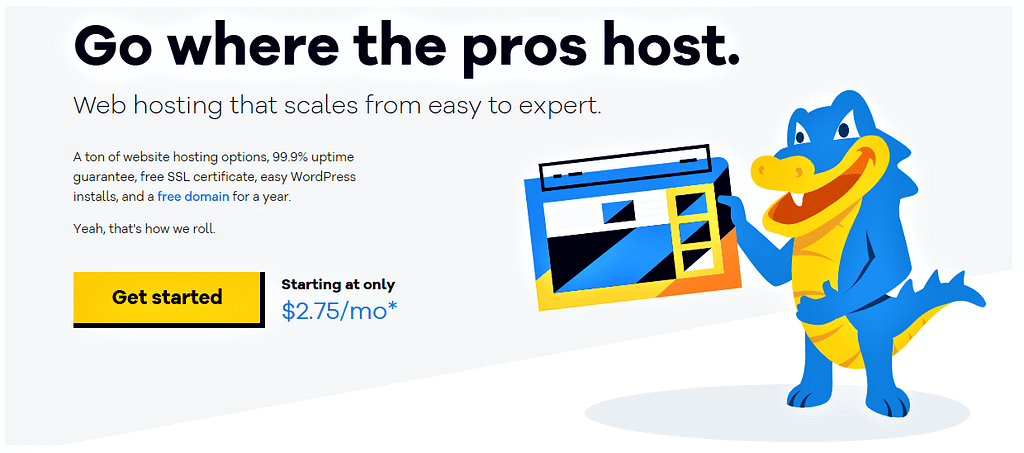
The first thing you have to do is – launch hostgator.com website. On the homepage of this website, you will see the info as in Figure 1 above.
Read this page to understand what actions you have to take to sign up with HostGator.
Choose Your Hosting Plan
HostGator offers plans as mentioned below in Figure 2a. Choose one that suits your need.
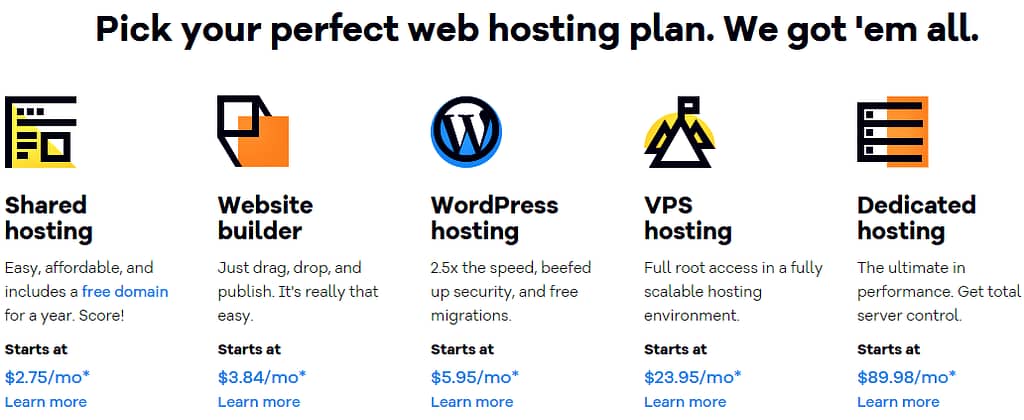
Most users in general and the beginners in particular start with the shared hosting. The reason for that is – it is economical. Of course, there are advantages and disadvantages of using the shared hosting.
However, the disadvantages are insignificant as compared to the advantages.
So, what is the shared hosting?
The answer is – the shared hosting is one that allows you to use the space on the host’s server that other websites also use. That means each user gets a shared bandwidth on the server.

Hostgator offers shared hosting plans as in Figure 2b above to choose from. You can choose one of the three plans. If you are building your first website, you can start with the Hatchling Plan that hosts one website only.
However, if you have a plan to launch more websites than one, you can sign up for a Baby Plan. With this plan, you can host unlimited websites on their server. There is also a third plan – the Business Plan, the beginners should not think about.
There is very little difference between the Hatchling Plan and the Baby Plan. That difference lies in the price of the plan and the number of websites. There is no other feature difference between the two.
Once you have decided the plan you want to subscribe to, just click By now as in Figure 2b above.

After you click By now, you will land on to a page as in Figure 3 above.
7 Steps To Complete Your Account Creation
You have to perform the following actions on this page to complete your account creation.
- Choose a Domain
- Choose a Hosting Plan
- Create your HostGator Account
- Enter your Billing Info
- Add Additional Services
- Enter a Coupon Code and
- Review Order Details
Choose A Domain Name
As in Figure 3 above, you will be asked to enter a domain name for your website. Think about the name for a while. It will be good to have a domain name that reflects your business. It should be easy to remember. Also, your website visitors should find it easier to spell and pronounce well.
Most of the websites are on .com domain. So, prefer to have a .com domain for your website. Of course, if your chosen .com domain name is not available, HostGator will suggest you a similar domain name with top level domains (TLDs) other than .com. Some of the popular TLDs are . org, .website, .info, .tech and .host and so on.
Choose A Hosting Plan
Then, choose your hosting plan. To choose a hosting plan, first you will have to choose one of the Hatchling, Baby and Business Package Types. Then, choose one of the 1 month, 6 months, 12 months and 36 months Billing Cycle. The amount you pay varies as per your chosen Package Type and the Billing Cycle.
Create Your HostGator Account
Next, fill in the fields in steps 3 and 4. As you see in Figure 3 above, steps 4, 5, 6 and 7 do not show up there. Just scroll down the page when you are actually signing up with HostGator. On doing so, steps 4 to 7 will show up for you to fill them in.
As you see at step 5 above, HostGator asks you to add additional services to your account. To begin with you may choose not to add any of these additional services. If you feel you need any of them later, you can add them at that time.
Also, if you have, add a coupon code at step 6.
You are almost done. Just review your order details at step 7 and tick the check box at the bottom to agree to HostGator’s Auto Renewal Terms, Terms of Service and Cancellation Policy and acknowledge receipt of the Privacy Notice.
After that, click the Checkout Now! Button.
Congratulation! Your sign up with the HostGator is now complete.
Subsequently, HostGator will send you a Welcome email to your email address that you used for creating your account. Your email is your Sign In Email to login to your HostGator dashboard. This welcome email also contains a password that you need to use as your Sign In Password with your Sign In Email. You will use these credentials in Figure 4c.
The email also contains a link to your control panel or the cPanel and another set of login credentials – the username and the password. You can click on this link and enter the credentials to login to cPanel directly. This cPanel link is https://gator1111.hostgator.com:2083. When you click on this link, you will get to your cPanel login page as in Figure 4a below

Other than the login credentials that I mentioned above, the email contains the IP address, name servers, chosen plan name and the domain name of your website.
Remember, the Customer Portal is the gateway to your customer dashboard and the cPanel.
Single Sign On
HostGator provides their shared hosting plan customers a Single Sign-on facility. This facility allows the customers to navigate through both the Customer Portal and the cPanel by using the Sign In Email and the associated Password that HostGator sends with the Welcome Email. I have already mentioned about these credentials above.
I already have subscribed to a shared hosting plan with HostGator that hosts my website pkailash.com. To show how to use Single Sign On to access my HostGator Dashboard and subsequently launch cPanel, I will use this account of mine.

With a Single Sign-on, you can navigate through the cPanel as follows:
- Launch the HostGator website at https://hostgator.com
- Then click Sign In to Portal as in Figure 4b above
- You will land on to HostGator’s Sign In login page as on the left side in Figure 4c below
- In the Email box enter your email address that you signed up with to HostGator and then click Next
- Then enter your password in the Password box that displays subsequently (Look at the right side window in Figure 4c) and click Login

- You will land on to the next page that displays HostGator’s Customer Dashboard as in Figure 4d below

- You are just one step away from installing WordPress on your server
- Now, click Launch cPanel in Figure 4d above
What You Can Do When You Login To Your cPanel
HostGator will send you an email on how to log in to your website’s hosting control panel, popularly known as cPanel.
Like other web hosts, HostGator provides a cPanel to website creators so that they can manage the backend of their hosting dashboard.
The cPanel lets the website creators perform the following tasks on their hosting account.
- Install WordPress
- Organise the server and manage files on it
- Create domain related email accounts
- Check the server usage statistics
- Install required software on to the server
- Run and schedule website backup
- Manage security of their websites
The above list provides just a few important tasks. In fact, the website creators can use the cPanel for accomplishing many more tasks.
The email contains instructions on how you have to log into your cPanel. After you login, HostGator will show you an easy to use wizard that will guide you through the process of installing WordPress on your domain.
On cPanel, the Control Panel you will install WordPress to host your website. There are several other things that you will do on the cPanel.
Installing The WordPress
How I installed the WordPress on my server? Truly speaking, I struggled a lot. Because I was not very clear about the steps that I needed to follow. In fact, it took days for me to clear my doubts. I went through various reading materials to learn facts about WordPress and installing it on the HostGator’s server.
Finally, I succeeded in installing WordPress on the server.
First, I logged in to my HostGator hosting account’s dashboard. The steps I followed are as in Figure 4b, 4c, 4d and finally 4e.
In Figure 4e, I clicked QuickInstall in the SOFTWARE section
I logged into the cPanel of my website. A portion both on the top and bottom of the cPanel has been cut in the image in Figure 4d below.

The first entry in the SOFTWARE section in Figure 4e above is QuickInstall. I clicked QuickInstall to get to the page as in Figure 5 below.

As you see in the above image, One Click Installs offers to install several applications by clicking on their name. Those names include WordPress and a few others like Joomla, Drupal, PrestaShop and WHMCS.
Since, I am interested in installing WordPress, I just clicked on WordPress in Figure 5 above. By doing so, I launched WordPress Installer wizard as in Figure 6 below.

And in the next step, I clicked Install WordPress as in Figure 6 above. Subsequently, I landed on to another page as below.

Click the drop down menu in the top left box as in Figure 7 above. And then select the domain you want to install your WordPress on. On the right side of this box is a slash sign and on the right side of this sign is another box. This is the directory field.
If you prefer installing WordPress on the root of the directory, leave this field unchanged. Most people install WordPress on the root directory.
Now fill in other details such as Admin Email, Blog Title, Admin User, First Name and Last Name in the respective boxes.
The next thing you have to do is – click Install WordPress.
The installer starts running in the background to install WordPress on your domain. Once QuickInstall finishes installing WordPress on your server, you get a success message with the details as in Figure 8 below.

As you see in Figure 8 above, the WordPress is installed on your server. With that, you are done with the installation of WordPress on your server.
The message shows the directory to which I installed WordPress. Also, it shows a user name and a password that I can use to login to my WordPress dashboard.
You are now getting closer to understand how a learner can create a WordPress site and launch it on the World Wide Web.
Login As Admin To Create Your WordPress Site
After the successful installation of WordPress on your server, you can proceed towards logging in to your WordPress dashboard.
Click LOGIN in Figure 8 above to launch your WordPress dashboard. You will get to the WordPress Log In page as in Figure 9 below.

Enter your Username and Password from Figure 8 above in the respective boxes in Figure 9. You will land on to your WordPress dashboard as in Figure 10 below.

Now you are ready to customise your website, create your must have pages.
Then you can create posts and depending upon your need add features and functionality to your website by adding plugins.
Since, the WordPress is already installed on my HostGator server and I have already created posts and pages, the dashboard is not empty. Also, I have already installed a theme and customised my website to give it a design that I liked.
I have added several plugins to my website to add functionalities to it.
This is how a learner can create a WordPress site while learning everything about this software.
Concluding Sentences for How Can a Beginner Create a WordPress Site?
Since you have read this post, you might have got the answer to the question – can a learner create a WordPress site?
I have used the term site and website interchangeably in this post. However, the term site, in its precise meaning, refers to both a blog and a website. There is not much difference between the two. However, if you want to learn how they are different, I have written a separate post on the differences between the blog and website.
Your Feedback Here